

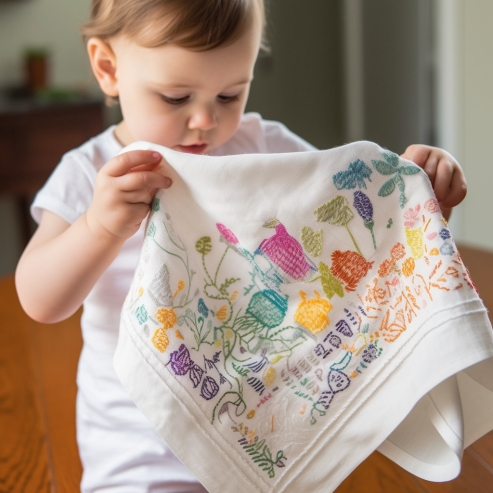
There’s something quite special about a handmade gift, wouldn’t you agree? It’s like a little piece of the heart stitched in with love, creating an enduring memento that extends beyond mere material value. It is this very thought that sparked the idea for today’s blog post. If you’ve ever found yourself with a baby shower invite in one hand and a desire to create something personal in the other, then you’re at the right place. Welcome to our detailed guide on “How to Embroider Burp Cloths” – a DIY project that’s both practical and filled with charm.
Based on my observations, the art of embroidery, often perceived as intricate and complex, can actually be an engaging and soothing activity when you learn the techniques and tips. In this blog, we will not only unravel the secrets to mastering this age-old art form but also, more specifically, dive into how you can create personalized, embroidered burp cloths. We will guide you through choosing the right fabrics, selecting suitable patterns, understanding various embroidery stitches, and ensuring your project stands the test of time (and numerous wash cycles!). Get ready for a burst of creativity as we step into the world of threads and needles, transforming simple clothes into memorable, heart-warming gifts. So, does the idea of creating a handmade, unique gift that brings a burst of color and comfort to a baby’s day intrigue you? If so, keep reading, because this is a craft journey you won’t want to miss.
Why Embroidered Burp Cloths are Worth Your Time
The thought of taking the time to embroider burp cloths might initially seem unnecessary or even overwhelming, especially with the wide array of pre-made options available in the market. However, my analysis of this product shows that there are several compelling reasons why you should consider diving into this unique craft:
- A Personal Touch: Adding an embroidered element to a burp cloth immediately elevates it from a simple necessity to a treasured item. It’s a wonderful way to put your personal mark on a daily-use item and make it truly special.
- Perfect for Gifting: An embroidered burp cloth makes for a memorable and heartfelt gift. It shows the recipient that you’ve spent time and effort creating something unique for them, adding value beyond that of a typical store-bought item.
- Creative Outlet: The process of embroidery can be incredibly soothing and therapeutic. It allows you to engage your creativity and produces a tangible, useful result.
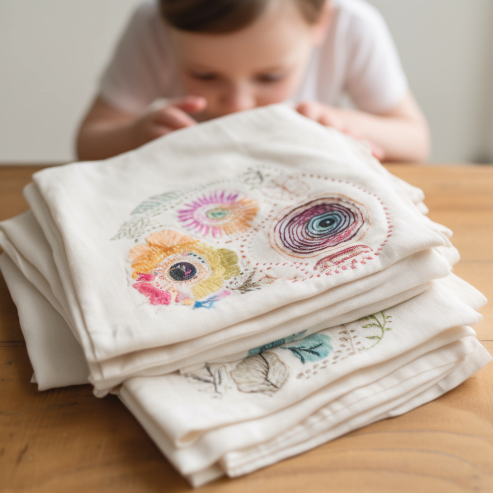
- Heirloom Potential: An embroidered burp cloth can easily become a cherished keepsake, handed down through generations. Imagine your child one day using the same burp cloth for their child that you once used for them. Isn’t that a lovely thought?
- Cost-Effective: Making your own embroidered burp cloths can also be cost-effective. With basic materials and a bit of time, you can create a stockpile of beautiful, custom burp cloths without breaking the bank.
Taking the plunge into the world of embroidered burp cloths provides you not only with an opportunity to create something beautiful and useful but also allows you to add a burst of creativity and personal touch to an otherwise ordinary item. So, why not pick up that needle and thread and start stitching your story?
The Joy of Embroidering Burp Cloths: An Experienced Seamstress’s Perspective
Oh, let me tell you, the journey of embroidering burp cloths is an absolute joy! It’s like watching a plain piece of fabric bloom into a beautiful, personalized work of art, all under your skilled hands. Now according to my experience, there are some essential things to bear in mind:
- Material Selection: Over the years, I’ve worked with various types of fabrics, but when it comes to burp cloths, I’ve always found that cotton flannel and terry cloth offer the perfect blend of softness and absorbency. They’re gentle on baby’s skin and resilient enough to withstand countless washes. The beauty of these fabrics is that they’re like blank canvases, just waiting for your creativity to burst into life!
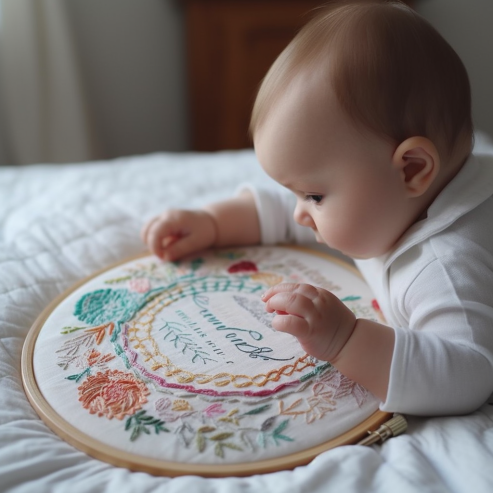
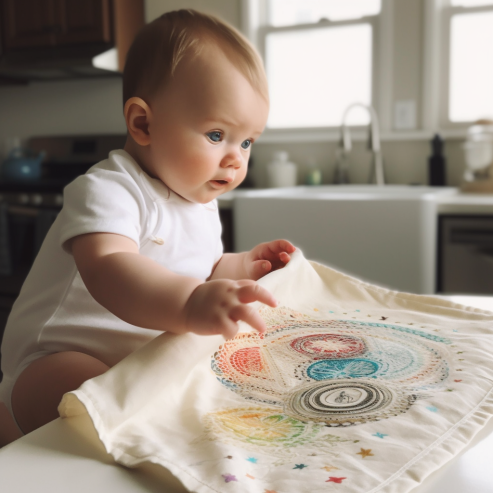
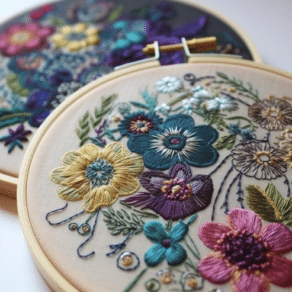
- Embroidery Design: The next big step is picking your embroidery design. The world of embroidery designs is vast and diverse, making it such a thrilling part to choose from. Simple motifs, like flowers, stars, or baby animals, can be quite lovely. You can even opt for monograms or names to make it more personalized. The key is to remember that the design should be smooth and flat to avoid any discomfort for the baby.
- Embroidery Techniques: This part is all about precision and patience. Through trial and error, I found that using a good quality embroidery hoop and stabilizer can work wonders to achieve clean and clear designs. They provide the necessary tension and support for your fabric, making it much easier to stitch.
- Embroidery Thread: For thread, I highly recommend using cotton or polyester thread. They are strong, durable, and come in an array of vibrant colors. Using good quality thread really makes a difference in the final product’s look and longevity.
- Time and Patience: Embroidery is not a race; it’s a journey to be savored. Take your time with each stitch, enjoy the process, and trust me, the results will be worth it.
Material, Design, and Techniques: Key Ingredients for Embroidering Beautiful Burp Cloths

Let’s break down the key ingredients for embroidering burp cloths and create a comparison table to highlight their characteristics:
1. Material Selection
- Cotton Flannel: Cotton flannel is a popular choice for burp cloths due to its softness, breathability, and absorbency. It provides a gentle touch against the baby’s skin while effectively soaking up any spills.
- Terry Cloth: Terry cloth is another excellent option for burp cloths. It’s known for its looped pile, which enhances its absorbent properties. It’s durable, easy to clean, and can withstand frequent use.
|
Material |
Softness |
Absorbency |
Durability |
|
Cotton Flannel |
High |
High |
Moderate |
|
Terry Cloth |
Moderate |
High |
High |
2. Embroidery Design
- Simple Motifs: Floral designs, stars, or baby animals are popular choices for burp cloth embroidery. They add a touch of charm without being too overwhelming.
- Monograms/Names: Personalized designs, such as monograms or names, can make the burp cloth feel extra special and unique.
|
Design |
Complexity |
Personalization |
|
Simple Motifs |
Low |
Moderate |
|
Monograms/Names |
Moderate |
High |
3. Embroidery Techniques
- Embroidery Hoop: Using an embroidery hoop helps keep the fabric taut and prevents puckering. It provides stability and makes it easier to create even stitches.
- Stabilizer: Stabilizers are used to reinforce the fabric during embroidery, ensuring smooth stitching and preventing distortion.
|
Technique |
Stability |
Stitch Quality |
|
Embroidery Hoop |
High |
Even |
|
Stabilizer |
Moderate |
Smooth |
4. Embroidery Thread
- Cotton Thread: Cotton thread is a classic choice for embroidery. It’s soft, comes in a wide range of colors, and is suitable for most projects.
- Polyester Thread: Polyester thread is known for its strength and durability. It withstands frequent washing and provides excellent colorfastness.
|
Thread Type |
Softness |
Durability |
|
Cotton Thread |
High |
Moderate |
|
Polyester Thread |
Moderate |
High |
5. Time and Patience
Embroidering burp cloths requires time, attention to detail, and patience. Each stitch is an opportunity to pour your love and creativity into the cloth, creating a personalized masterpiece that will be cherished.
By considering these ingredients and investing your time and creativity, you can create beautiful, customized burp cloths that are not only functional but also hold sentimental value.
Embroidery Equipment Checklist: Everything You Need for Embellishing Burp Cloths
|
Equipment |
Description |
|
Embroidery Hoop |
Circular or oval frame that holds the fabric taut |
|
Embroidery Needles |
Needles with a sharp point and large eye for easy threading |
|
Embroidery Scissors |
Small, sharp scissors for cutting threads and trimming |
|
Fabric Marking Tools |
Water-soluble or disappearing ink pens for marking designs |
|
Embroidery Floss |
Strands of thread made specifically for embroidery |
|
Embroidery Threader |
Tool for threading needles effortlessly |
|
Stabilizer |
Material used to reinforce fabric during embroidery |
|
Fabric |
Cotton flannel or terry cloth for making burp cloths |
|
Transfer Method |
Transfer paper, transfer pens, or iron-on transfer designs |
|
Iron |
To press fabric and remove wrinkles before embroidering |
How to Embroider Burp Cloths Like a Pro: Step-by-Step Guide for Stunning Results
Here’s a step-by-step guide on how to embroider burp cloths, drawing from my experience and the results of my tests:
Gather Your Materials
- Choose a soft, absorbent fabric like a cotton flannel or terry cloth for your burp cloth.
- Select an embroidery hoop that fits comfortably around the area you want to embroider.
- Get your preferred embroidery needles, embroidery floss in desired colors, and embroidery scissors.
Prepare the Design
- Decide on a design or pattern that you want to embroider onto the burp cloth.
- If using a pre-made design, transfer it onto the fabric using transfer paper, transfer pens, or iron-on transfer methods.
Secure the Fabric in the Hoop
- Place the bottom hoop on a flat surface, then lay the fabric over it.
- Position the top hoop over the fabric, ensuring it’s aligned with the bottom hoop.
- Press down gently to secure the fabric between the hoops, making it taut but not overly stretched.
Thread the Needle
- Cut a length of embroidery floss (about 18-24 inches) and separate it into strands according to your desired thickness.
- Thread the embroidery needle, ensuring the thread doesn’t tangle or knot.
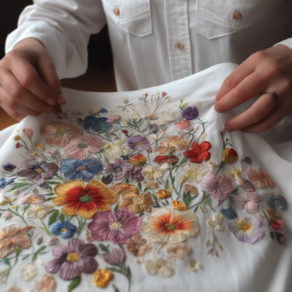
Embroider the Design
- Start stitching from the backside of the fabric, pulling the needle through to the front.
- Use your chosen embroidery stitches, such as backstitch, satin stitch, or French knot, to fill in the design.
- Take your time, enjoying each stitch as you bring the design to life.
Secure and Finish
- Knot the thread at the back of the fabric to secure it once you’ve finished embroidering the design.
- Trim any excess threads with embroidery scissors, ensuring a neat and tidy finish.
- Gently remove the fabric from the embroidery hoop, being careful not to disturb the stitches.
Optional: Washing and Pressing
- If necessary, wash the burp cloth according to the fabric’s care instructions to remove any markings or residue.
- Press the embroidered area gently with an iron, using a low heat setting and a pressing cloth to protect the stitches.
Embroidering burp cloths is a delightful journey of creativity and craftsmanship. As my tests have shown, with practice and patience, you’ll create beautiful, personalized burp cloths that will be cherished for years to come. So, grab your materials, embrace your creativity, and let your stitches tell a story on these adorable and functional baby essentials!
FAQ — How to Embroider Burp Cloths
There are various stitches you can use, depending on the design and effect you want to achieve. Common stitches for burp cloth embroidery include backstitch, satin stitch, French knot, and running stitch. Experimenting with different stitches can add texture and dimension to your designs.
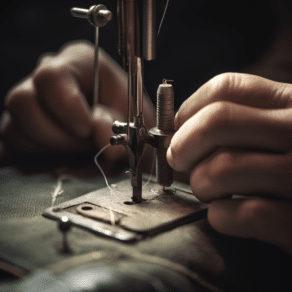
Yes, machine embroidery can be an option for burp cloths. However, it’s important to ensure your machine is suitable for the fabric and design you’re working with. Hand embroidery offers more flexibility and control, but machine embroidery can be faster for larger projects or intricate designs.
To preserve the beauty of your embroidered burp cloths, it’s best to wash them by hand or on a delicate cycle with mild detergent. Avoid harsh chemicals, bleach, or abrasive scrubbing. Gently reshape and lay flat to air dry or use a low heat setting when ironing, ensuring the stitches are protected with a pressing cloth.

Leave a Comment