Are you tired of your cold, hard floors and looking for a way to add a touch of warmth and coziness to your living space? Or perhaps you’re an avid DIY enthusiast, eager to learn a new skill and create something beautiful for your home. If so, then you’ve come to the right place! In this blog post, we will explore the fascinating world of rug tufting and, more specifically, guide you through the process of making your very own tufting rug frame. With this essential tool, you’ll be well on your way to crafting an exquisite, one-of-a-kind rug that is sure to impress your friends and family.
We’ll start by diving into the history and various techniques of rug tufting, helping you understand the rich tradition behind this artistic craft. Next, we’ll present a step-by-step guide on constructing a tufting rug frame from scratch, along with a list of materials you’ll need and tips for selecting the perfect size and style for your project. Lastly, we’ll discuss some common challenges and best practices to ensure your rug tufting journey is smooth and enjoyable. So, are you ready to embark on this creative adventure and transform a simple piece of fabric into a stunning, handcrafted masterpiece? Let’s get started!
If you do not have time to make such a frame or you do not want to do it yourself, we have selected ready-made options for you. You can buy the whole frame or the necessary parts. Take a look, maybe something will suit you.
| Image | Product | |
|---|---|---|
Completely done 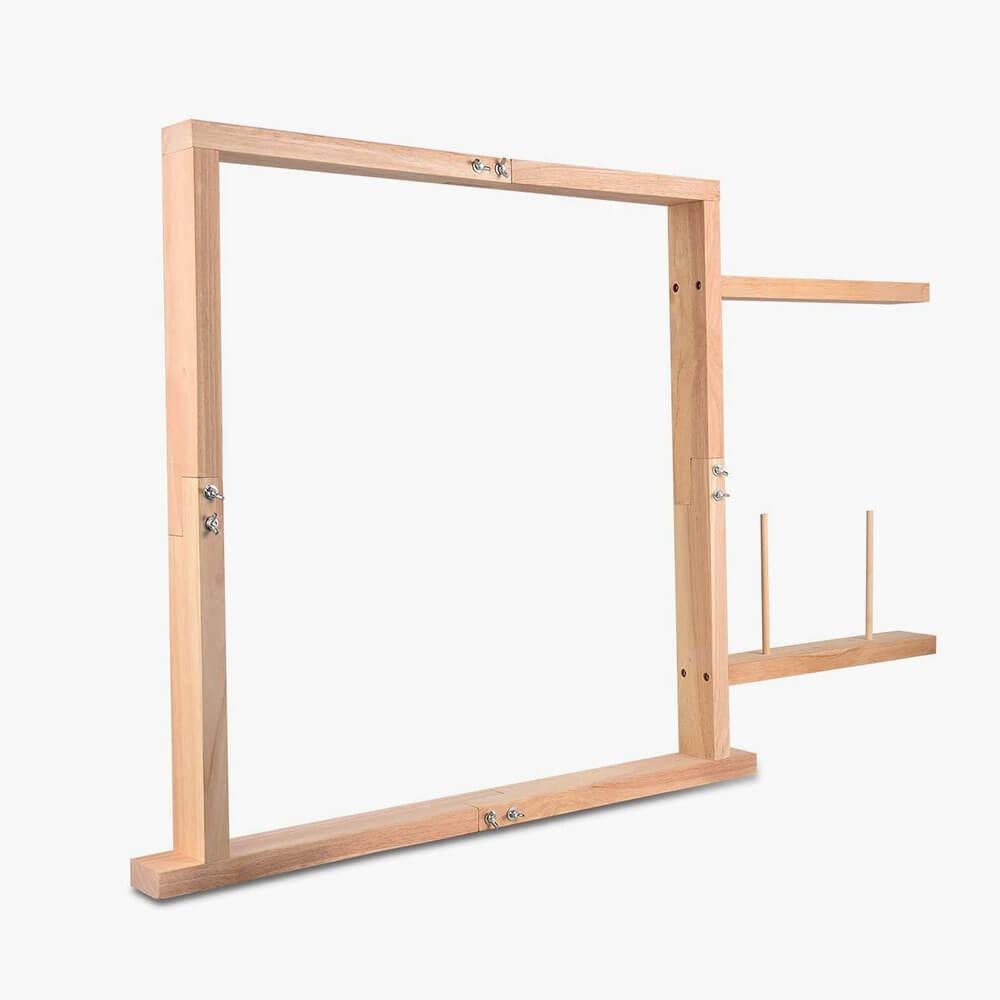 | Tufting Frame
| Check Price |
Pre-nailed 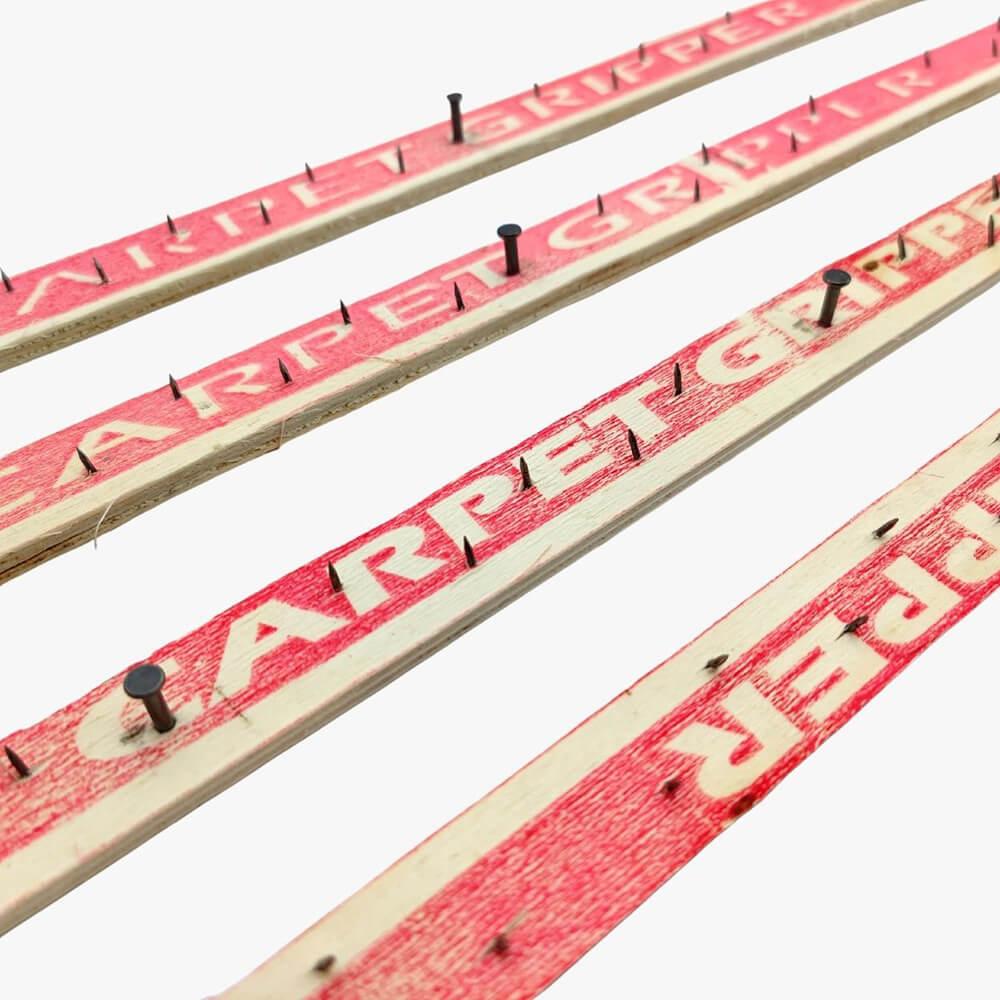 | Wooden Carpet Tack Strip for Tufting Frame
| Check Price |
Weight: 450g (1lb) per piece 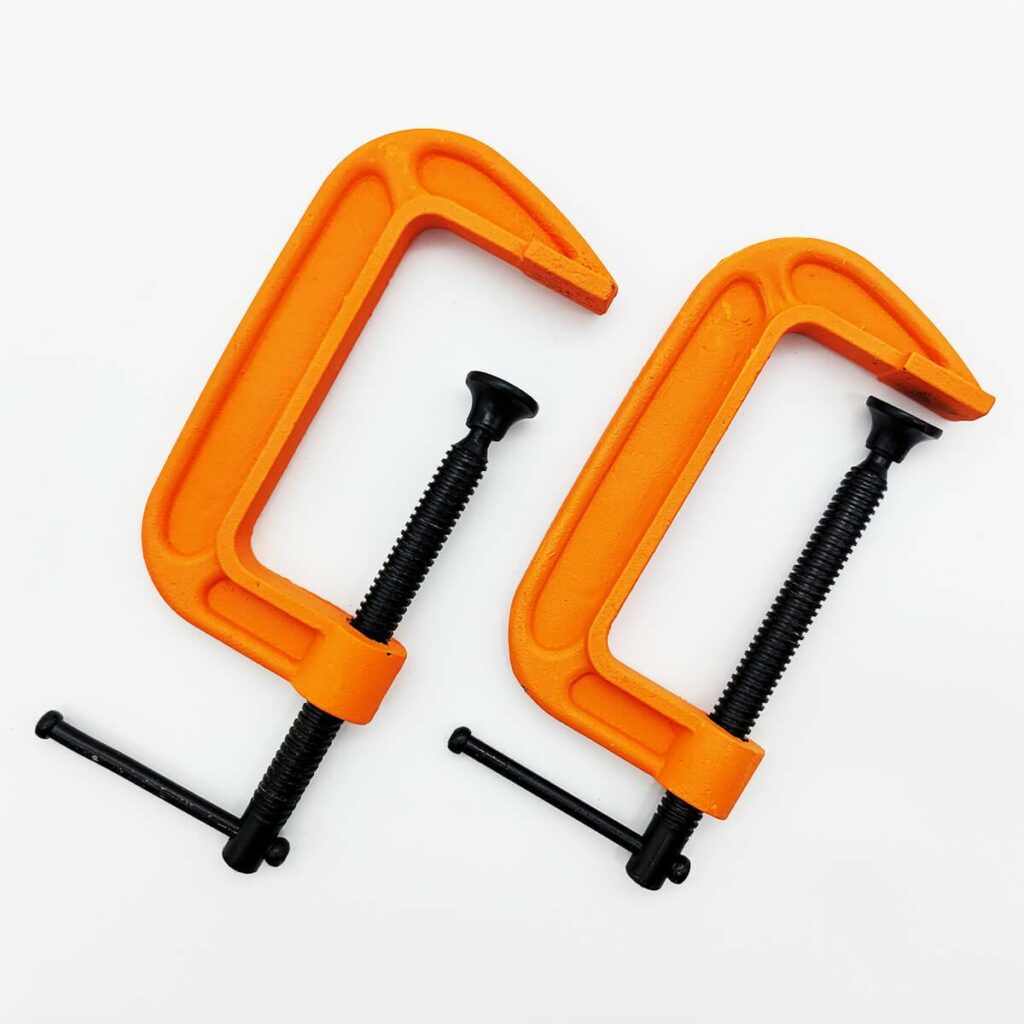 | 4 Inch G Clamps for Tufting Frame (2PCS)
| Check Price |
The Art of Tufting: How a Simple Frame Can Transform Your Rug-Making Journey
A tufting rug frame is a specialized tool used in the art of rug tufting, a technique that involves creating rugs by inserting and looping yarn through a fabric base. The frame serves as a sturdy support structure that holds the fabric taut while you work, allowing for precise and even tufting as you create your design. It typically consists of a rectangular or square wooden frame, often with adjustable or removable bars, to accommodate different fabric sizes and maintain the desired tension throughout the tufting process.
Using a tufting rug frame is essential for achieving professional-looking results and maintaining consistency in the rug’s texture and appearance. It not only simplifies the tufting process but also helps prevent strain on your hands and wrists, making it more comfortable to work on your project for extended periods. By building your own tufting rug frame, you can customize the dimensions to suit your specific needs, ensuring a perfect fit for your unique rug designs.
Why a Tufting Rug Frame is a Game-Changer for Your Rug Crafting Endeavors
- Efficiency: A tufting rug frame makes the process of creating your rug much faster and easier, allowing you to focus on your design rather than struggling to maintain tension in the fabric.
- Consistency: Using a frame helps ensure that your tufts are evenly spaced and of uniform height, leading to a professional-looking rug with a smooth, even texture.
- Comfort: Working on a tufting rug frame reduces strain on your hands and wrists, enabling you to comfortably work on your project for extended periods of time.
- Versatility: With an adjustable or removable frame, you can easily accommodate various fabric sizes and tension preferences, making it perfect for all your rug tufting projects.
- Customization: Building your own tufting rug frame allows you to tailor the dimensions to suit your specific needs, ensuring a perfect fit for your unique rug designs.
In summary, using a tufting rug frame is the key to unlocking your full potential as a rug tufting artist. It not only enhances the quality and appearance of your final product but also makes the entire process more enjoyable and rewarding.
My Love Affair with the Perfect Tufting Rug Frame: A Personal Journey
As a tufting enthusiast, I cannot stress enough the importance of having a high-quality tufting rug frame for all your rug-making projects. It’s a game-changer, I promise! Let me share my excitement and guide you through my personal experience of making a tufting rug frame.
- Materials: Using sturdy, durable materials for your frame is crucial. I love working with solid wood, like pine or oak, as it gives the frame the perfect combination of strength and longevity. Trust me, investing in good-quality materials will make your rug-making journey a breeze!
- Adjustability: Creating an adjustable frame is a genius move! It lets you work on various rug sizes with ease. The ability to modify the frame to fit my projects is such a blessing – I can’t imagine going back to a fixed-size frame now.
- Assembly: Assembling the frame might seem intimidating, but it’s actually quite straightforward. I recommend using strong metal brackets and screws to secure the corners of the frame, ensuring stability and sturdiness. Your hard work in assembling the frame will pay off tenfold once you start tufting!
- Tension: Achieving the perfect tension in your fabric is essential for smooth and even tufting. I’ve found that using a fabric gripping strip (like those used for latch hooking) along the frame edges works wonders in holding the fabric taut. It’s a game changer, and it makes adjusting the fabric tension so much easier!
- Portability: I adore the convenience of having a lightweight and portable frame. It allows me to tuft wherever I please – be it in the living room while watching TV, or outside on a sunny day. The freedom to move my frame around has truly enhanced my rug-making experience!
Making my own tufting rug frame has been a delightful and rewarding experience. It has completely transformed my rug-making process, and I couldn’t be happier with the results. So, fellow tufting enthusiasts, embrace the thrill of crafting your own frame and unlock the full potential of your rug tufting skills! 🎉
From Start to Finish: The Comprehensive DIY Guide How to Make a Tufting Rug Frame
Step 1. Gather your materials
Before you start, make sure you have all the necessary materials and tools at hand. You’ll need:
- Wood or PVC pipes for the frame (e.g., pine, oak, or PVC)
- Metal brackets and screws or wood glue and dowels for assembly
- Wing nuts and bolts or Velcro straps for adjustability
- Fabric gripping strips, staples, or tacks for tension
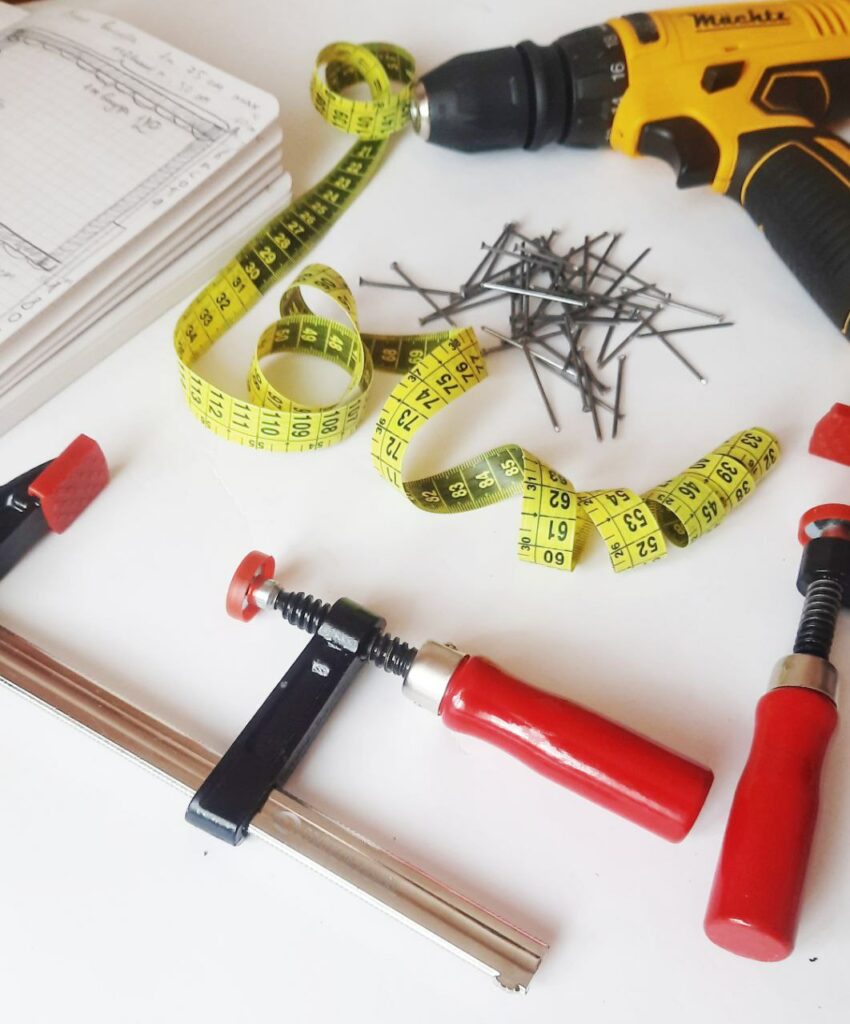
- Saw, drill, screwdriver, and measuring tape
Step 2. Measure and cut
Determine the desired dimensions of your tufting rug frame based on your project size. Measure and cut your chosen frame material (wood or PVC pipes) into four pieces – two for the length and two for the width of the frame.
Step 3. Assemble the frame
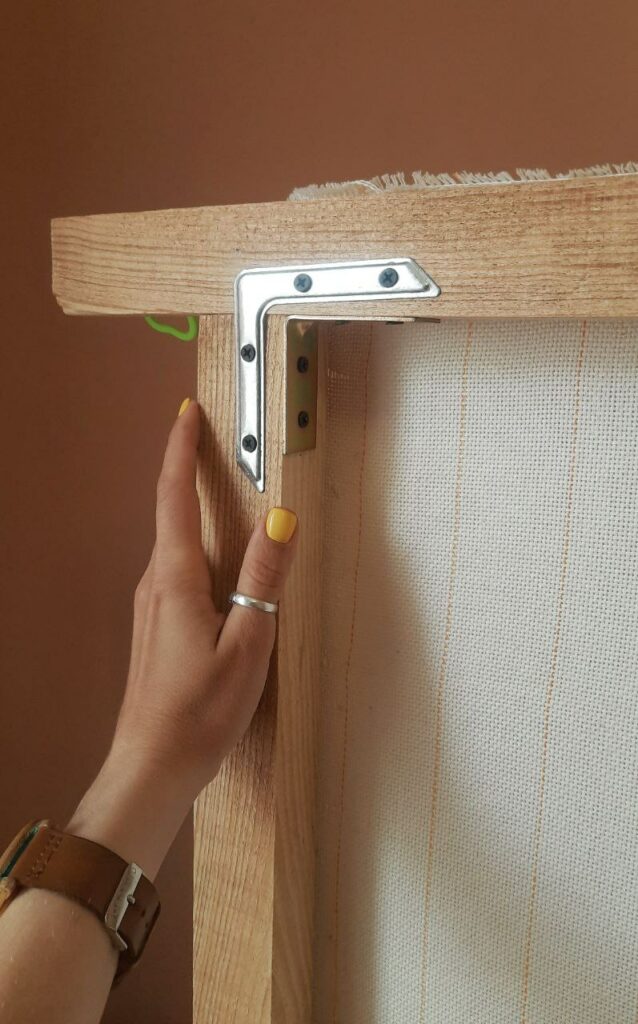
If using metal brackets and screws, align the cut pieces to form a rectangle, and secure each corner with a metal bracket and screws. If using wood glue and dowels, drill holes for the dowels, apply glue, and join the pieces, ensuring that the corners are square.
Step 4. Add adjustability
For a frame with adjustable bars, drill holes on the longer sides, and insert wing nuts and bolts, or attach Velcro straps to the shorter sides. This will allow you to modify the frame size and tension as needed.
Step 5. Attach the fabric gripping system
Choose your preferred method for maintaining tension in the fabric. If using fabric gripping strips, staple or tack them to the inner edges of the frame. If using staples or tacks alone, ensure they are evenly spaced and ready to hold the fabric securely.
Step 6. Prepare your fabric
Measure and cut your fabric base to match the dimensions of your frame, leaving extra fabric around the edges for attaching it to the frame.
Step 7. Attach the fabric to the frame
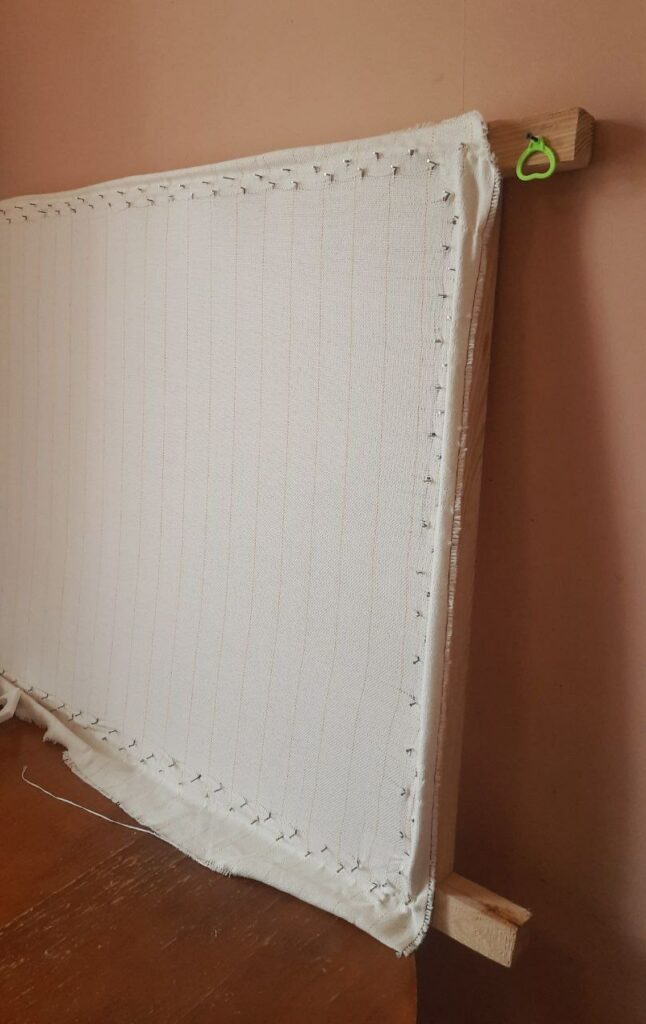
Stretch your fabric base over the frame, ensuring that it is evenly spaced and taut. If using fabric gripping strips, press the fabric edges into the gripping strips. If using staples or tacks, attach the fabric to the frame, working from the center outwards to maintain even tension.
Step 8. Adjust the tension
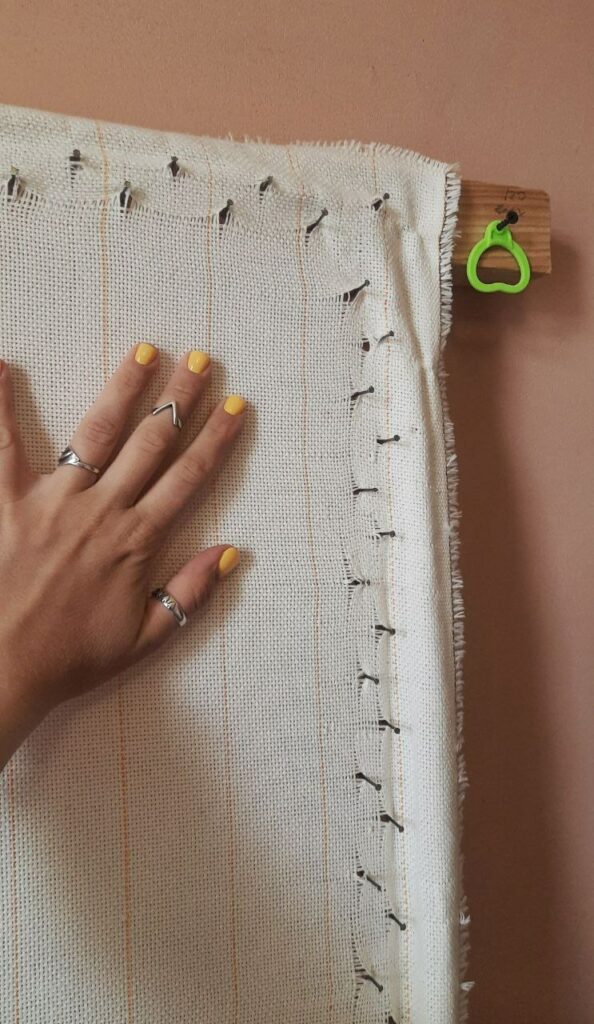
Once your fabric is attached, check the tension and make any necessary adjustments using the wing nuts and bolts or Velcro straps.
Congratulations! You’ve successfully crafted your very own tufting rug frame. Now you’re ready to embark on your rug-making journey and create beautiful, handcrafted rugs with ease and precision.
Frequently Asked Questions (FAQ) for Making a Tufting Rug Frame
The most commonly used materials for tufting rug frames are solid wood (e.g., pine or oak) and PVC pipes. Both options have their pros and cons, but ultimately, the choice will depend on your personal preferences and requirements in terms of durability, weight, and ease of assembly.
Yes, you can create an adjustable frame by incorporating wing nuts and bolts or Velcro straps. This will allow you to modify the frame size and tension to suit various projects and ensure the perfect tension for your fabric base.
There are several methods to maintain tension, such as using fabric gripping strips, staples, or tacks. The fabric gripping strips are highly recommended, as they provide a strong grip and are easy to adjust. Staples and tacks are also viable options, but they may be more challenging to adjust and could potentially damage the fabric.
Basic tools like a saw, drill, screwdriver, and measuring tape are typically needed to assemble a tufting rug frame. The specific tools required may vary depending on the materials and assembly method chosen.
o create a stable and durable frame, be sure to choose high-quality materials, such as solid wood or sturdy PVC pipes, and use strong metal brackets and screws or wood glue and dowels for assembly. Always double-check that the corners are square and that all connections are secure before attaching your fabric base.
Yes, you can design your frame with portability in mind by using lightweight materials, such as thinner wood or PVC pipes, and incorporating a detachable frame design. This will allow you to disassemble the frame for easy transportation and storage when not in use.





Leave a Comment