
Why should you learn to thread your own machine instead of taking it to a shop? For starters, it saves time and money. Just think – no more wasting precious hours and gas dropping off and picking up your machine for a basic maintenance task. Threading also allows you to switch threads and needles as your project demands, giving you more creative freedom. Knowing how to thread means you can troubleshoot stitch issues and get sewing faster when threads slip out of place. So grab your machine and let’s get started! This essential skill will give you sewing independence and help you get the most out of your creative time.
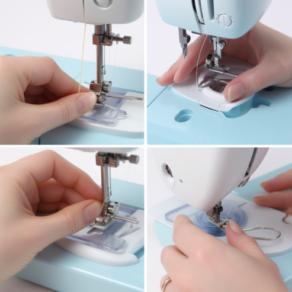
In this blog post, I’ll walk you step-by-step through threading a Singer sewing machine. From my experience, Singer machines have a very similar threading process, with only minor differences between models. We’ll cover everything from selecting the right needle and thread to routing the top thread correctly and inserting the bobbin. With some focused practice, you’ll soon be threading your sewing machine with confidence!


Leave a Comment