Whether you’re working with a delicate strand of laceweight yarn or bulky super chunky wool, having a smooth wound ball is crucial. Taut, consistent tension makes stitches uniform and helps prevent splitting, frayed yarn that disrupts your rhythm. An organized, tangle-free ball portably contains your yarn while keeping the strands accessible as you work without interruption.
While winding methods differ based on the weight, fiber, and other properties of the yarn, the goal is ultimately the same – to produce an even, untangled ball that feeds smoothly. In the following sections, I’ll walk through step-by-step instructions for winding yarn into a ball in three different ways. From hand rolling to using a winding machine, you’ll learn pro tips to master winding yarn for flawless feeding every time you crochet or knit.
Why Properly Winding Yarn Matters
While gadgets can help, winding yarn ultimately comes down to mastering tension. Maintaining taut but gentle, consistent tension from start to finish minimizes bulk while allowing the fibers to align smoothly as they wrap around themselves. The strands bond together just enough to stay put without compacting. This produces a pleasingly round shape that feeds out effortlessly.
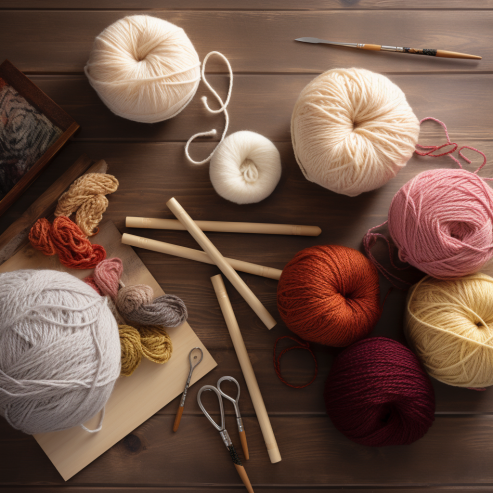
The winding method depends on the properties of the yarn itself, but the goal remains the same: to produce a perfectly spherical, compact yet airy ball that pulls from the center without collapsing. In the following sections, I will delve into step-by-step techniques to master three common methods for winding smooth, tangle-free yarn ready for your needles.
Proper Technique is Key to Smooth, Flawless Balls
As an avid knitter, properly winding yarn is one of my favorite parts of starting a new project. I love transforming an unruly hank into a neat, organized ball that’s ready to become something beautiful! Through extensive experience, I’ve honed my techniques for rolling smooth, flawless yarn balls that feed perfectly every time.
When it comes to materials, I highly recommend investing in a good ball winder and yarn swift. These tools revolutionize the winding process with speed and precision. The swift unwinds the hank into a smooth column while the winder quickly rolls uniform center-pull balls – it’s mesmerizing to watch! The time savings are incredible compared to hand winding, and the results are picture-perfect. My favorite brand is Stanwood – their Amish-made maple winders are simply unbeatable for quality and durability. They truly take the hassle out of winding.
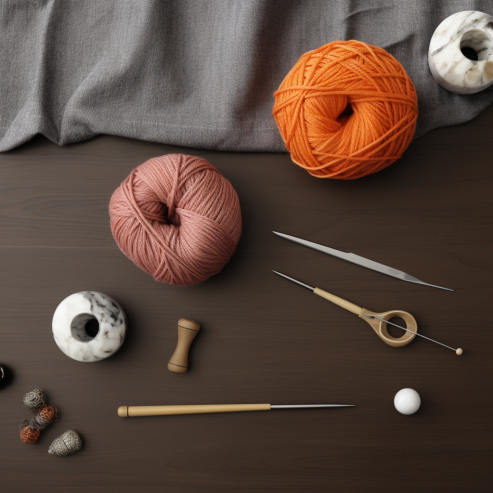
That said, I still enjoy hand-rolling yarn on occasions when I want a more mindful, organic experience. It’s extremely portable and satisfies my urge to touch the fibers. I find wrapping the strands around my fingers deeply relaxing. My key tips are working in a pet hair-free area and maintaining gentle, consistent tension throughout the process. Though it takes longer, the end result is very rewarding.
Overall, my investigation into yarn winding methods has shown that proper technique makes all the difference. My findings show that a bit of patience in the preparation stage prevents headaches and heartache down the road!
How to Roll Yarn Into a Ball – Choosing the Right Winding Method for Your Project
Over years of knitting, I’ve learned there are three main methods for winding yarn into a neat, tangle-free ball – by hand, using the center pull technique or with a ball winder. Each has pros and cons depending on your yarn type and personal preferences. Here are step-by-step guides to master all three techniques:
Hand Rolling Method
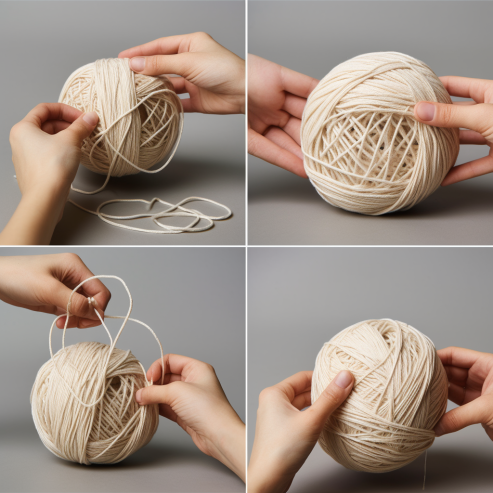
The most basic, organic way to wind yarn into a ball. It’s ideal for beginners and small, portable projects.
- Explanation: To hand roll, you simply wrap the yarn around three fingers, gradually forming a ball. This doesn’t require any tools – just you and the yarn. It allows you to control tension with your fingers as you wrap. However, hand rolling takes time and practice to master. It can be harder to keep tension perfectly consistent.
- Instructions:
- Take the yarn end in your dominant hand and extend your thumb, index, and middle fingers together.
- Use your non-dominant hand to hold the yarn ball as it forms, maintaining light tension on the strand.
- Wrap the yarn over your extended fingers, around the back of your hand. Continue wrapping evenly until the ball reaches the desired size.
- Add extra wraps around the bottom as you finish to secure the end.
Center Pull Method
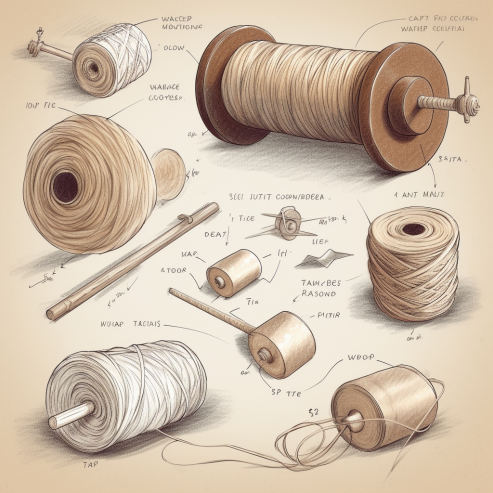
The center pull method creates a donut-shaped ball that pulls from the inside. This prevents the ball from rolling away as you knit.
- Explanation: This method requires a toilet paper or paper towel tube. Winding over the tube creates a hole through the center that the yarn pulls through. It takes more precision but allows continuous knitting without chasing a runaway ball.
- Instructions:
- Cut a toilet paper or paper towel tube to about 3-4 inches long.
- Fold a piece of paper over one end and secure it with tape to create a “base.”
- Insert the tube upright in a jar or cup to hold it steady.
- Leaving a 6-inch tail, wrap the yarn around the tube, guiding the strands gently apart as you wrap.
- Continue winding until the tube is fully covered.
- Remove the tube and tie a loose overhand knot to secure the ball. Pull the tail through the center hole to begin.
Using a Winding Machine
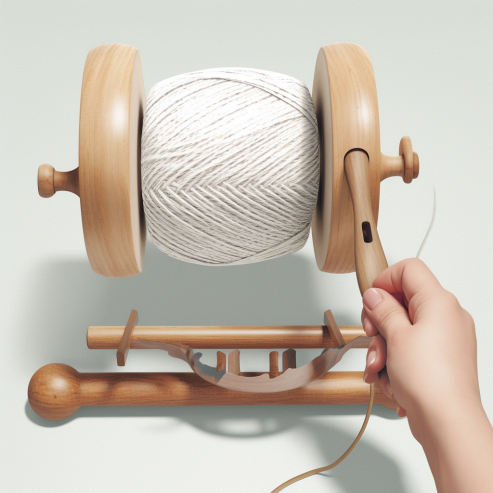
Winding machines quickly produce consistent, center-pull balls perfect for complex or large projects.
- Explanation: Mechanical ball winders are essentially fixed rod and rotating cones that automatically wrap yarn into flawless balls in minutes. This saves time and effort for big projects. However, the equipment can be expensive and unsuitable for thin yarns.
- Instructions:
- Secure the swift (rotating rod) and winder (cone) on a flat surface.
- Set the yarn skein on the swift and position the winder next to it.
- Feed the yarn end through the cone hole and onto the winder.
- Turn the handles to rotate the swift and winder, guiding the yarn smoothly onto the cone.
- When finished, remove the wound ball and tie end to secure.
- The right method depends on yarn type, project size, and personal preference. But mastering a smooth, tight yet pliable ball is key for flawless feeding and preventing mid-project disasters! Proper winding means you can focus on the joy of knitting, not untangling knots.
A Side-by-Side Comparison of 3 Ways to Wind Yarn into a Ball
Here is an ingredients comparison table for methods of rolling yarn into a ball:
| Method | Hand Rolling | Center Pull | Ball Winder |
| Main Equipment | Fingers | Toilet paper tube, jar | Yarn swift, ball winder |
| Yarn Needed | One skein | One skein | One or multiple skeins |
| Ease of Use | Simple, portable | More setup required | Easy but requires purchased equipment |
| Time Required | Longest | Medium | Quickest winding |
| Result | Inconsistent size/shape, moderate tension | Consistent center-pull ball, good tension | Very consistent size/shape, excellent tension control |
| Best For | Small/single skein projects, beginners | Medium projects, traveling | Large/multiple skein projects, advanced knitters |
| Limitations | Hard to maintain perfect tension | Only makes center-pull style balls | Expense of purchasing equipment |
In summary:
- Hand rolling is the most accessible method but takes time and practice to master consistent winding and tension. Best for small beginner projects.
- The center pull method allows smooth feeding from the center but requires more setup. Useful for medium projects and portability.
- A ball winder produces very consistent, center pull balls quickly. Ideal for bigger projects but requires buying specialty equipment.
The right winding method depends on your yarn, project size, skill level, and budget!
Troubleshooting Tension: How to Wind Yarn Just Right

Once you’ve mastered the winding methods, there are some key tips and tricks for avoiding tangles, adjusting tension, and storing yarn balls properly:
How to Avoid Tangling
Tangling is winding’s worst enemy. Use these tips to keep strands smooth and knots at bay:
- Wind in a clean, pet hair-free space to minimize snagging.
- Guide strands gently apart as you wrap to prevent overlapping.
- Stop winding before the ball gets overly full and tight. Oxygenation is key!
- For center pull balls, don’t allow strands to cross through the hole, creating knots.
How to Adjust Tension
Inconsistent tension leads to bulky, loose areas in the ball. Troubleshoot tension with:
- Tighter winding – Wrap more quickly, use a firmer touch, or try a thicker/wooden needle.
- Looser winding – Wrap more slowly, use a light touch, or try a thinner/metal needle.
- Check for overly loose/right sections and re-wind if needed for uniformity.
How to Store Yarn Balls
The way you store wound yarn also impacts how smoothly it feeds:
- Store center pull balls upright to keep the hole open and prevent distortion.
- For regular balls, find bins/baskets that allow the ball to roll freely as yarn pulls out.
- Avoid compression – Don’t stack tightly or store under heavy objects.
- Keep away from pets, sunlight, heat, and moisture that can damage fibers.
- Consider yarn bowl holders that gently contain the ball while feeding through a notch.
A few simple habits make all the difference between wrestling with a tangled mess and enjoying smooth, frustration-free knitting. Mastering the wind sets you up for knitting success!
Conclusion
Winding yarn may seem like a mundane first step, but this simple act lays the foundation for knitting success. Taking the time to properly prepare yarn pays off tremendously down the road. A neatly wound ball feeds smoothly off your needles without interruption, allowing you to get into the satisfying creative flow that makes knitting so enjoyable. Tight, inconsistent yarn causes headaches as you stop constantly to untangle knots and maintain even tension.
In review, evenly wound yarn is vital because:
- It prevents mid-project tangling, knotting, and frustrating breaks in rhythm.
- Taut, consistent tension creates uniform stitches and prevents split ends.
- An organized ball keeps the yarn accessible and portable as you knit.
- Proper tension alignment allows the fibers to smoothly feed through your needles.
- While methods differ based on yarn properties, the ultimate goal remains the same – an untangled, spherical ball that pulls effortlessly from the center without collapsing.
The winding process allows time to examine the yarn quality as well. Check for defects, inconsistencies, or problem areas that could disrupt your knitting. Address any issues now, before you’ve cast on and gotten engrossed in stitching.
Patience winding yarn creates a sturdy foundation that makes the rest of the journey more enjoyable. Take your time with this important first step, and your knitting will reap the benefits!
FAQ — How to Roll Yarn Into a Ball
How tight should I wind the yarn ball?
Wrap firmly but not too tightly. Overly loose balls can collapse and snag. However excessive tightness distorts the ball shape and compresses the fibers. Find a moderate tension that keeps the ball firm yet slightly springy.
Does the winding method matter for all yarn types?
Thinner and delicate yarns do best hand-rolled or with a specialty wool winder. Standard winders can split them. Bulkier yarns require looser wrapping by hand or machine. Adjust the method and tension to suit the yarn properties.
How big should the finished yarn ball be?
This depends on the project size. For small projects, a ball 2-3 inches wide is sufficient. Larger balls around 5 inches work well for bigger projects with multiple skeins. The ball should not be too large to prevent the inner yarn from getting trapped.
Can I re-wind an existing yarn ball?
Yes, you can re-wind balls that have become misshapen or tangled. Carefully unwind and examine for kinks first. Then re-roll following the techniques learned to improve the ball.
What is a yarn swift and how is it used?
A yarn swift is a tool made of a rotating rod and base that allows skeins to be unwound smoothly into a column for easier winding onto cones or balls. The swift prevents tangling and tension inconsistencies.




Leave a Comment