

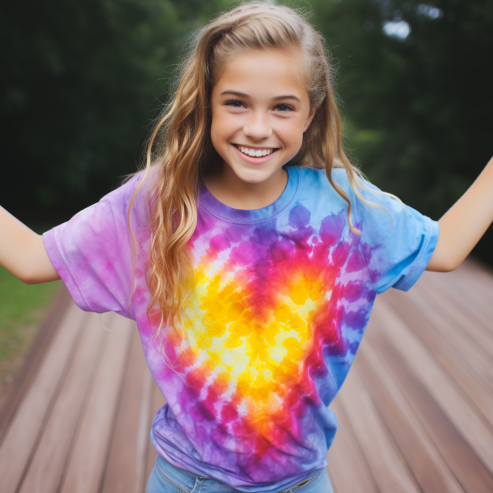
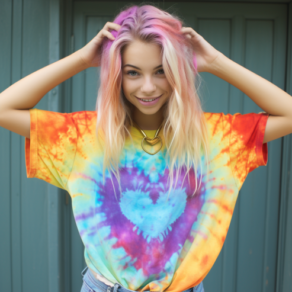
Have you ever wanted to wear your heart on your sleeve – or rather, on your shirt – in a burst of color and creativity? According to my experience, tie-dyeing is not just a process; it’s an artistic expression. And what’s more symbolic than capturing the essence of a heart in a swirl of vibrant hues? In this post, we’re diving deep into the world of tie-dye, exploring the techniques and tricks to craft that perfect heart pattern on a shirt. But why stop at traditional? With a sprinkle of imagination and a dose of burstiness, we’ll venture beyond the norm and into the realms of the extraordinary. So, are you ready to let your heart spill its colors in a heart tie-dye shirt masterpiece?
The Art of Tie-Dye
Ah, tie-dye! It’s more than just a burst of colors; it’s a dance of hues on fabric, a testament to human creativity. But what exactly is this technique that has caught our imaginations for so long?
- Origins: The tie-dye technique heart pattern isn’t a new-fangled trend from the groovy 60s. It dates back centuries, with different cultures like India, Japan, and Africa adding their own splash of genius to it over the years. The core principle has always remained the same – to create eye-catching patterns by controlling how fabric absorbs the dye.
- Process: The fundamental process is, well, just as the name implies! You tie or fold parts of the fabric to create barriers and then dye the cloth. The tied or folded areas resist the dye, resulting in intriguing patterns. Through trial and error over many tie-dye shirts, I found that even minute changes in the tying technique can result in dramatically different patterns.
- Burstiness in Play: Tie-dyeing isn’t a linear, predictable process. No, it’s about going wild with creativity! It’s where a structured process meets freeform experimentation, leading to those unexpected, ‘bursty’ patterns that capture our admiration. The heart design, in particular, provides ample room for colors to interact in surprising ways.
The Allure of the Heart Pattern
Of all the mesmerizing designs, the heart pattern stands out, symbolizing not just a shape, but an emotion. Why does this design captivate us so? Let’s explore:

- Symbol of Love and Connection: From my experience, when you wear or gift a heart tie-dye creation, it’s not just about the art, but the sentiment. The heart, universally known as a symbol of love, compassion, and connection, brings a touch of warmth to the already vibrant world of tie-dye.
- A Challenge for the Artist: The heart design, with its curves and symmetries, introduces a delightful challenge for the tie-dye enthusiast. It beckons one to go beyond the basics, experimenting with different folds and ties to get that perfect heart shape.
- Bursty Showcase: If you’re seeking to display burstiness in your work, the heart pattern is your canvas. The intricacies of the heart provide ample room for colors to interact in unexpected, ‘bursty’ ways, leading to outcomes that often surprise and delight the creator.
- Human-Like Emotion on Fabric: A heart tie-dye isn’t just a design; it’s a story, an emotion, a reflection of human-like vulnerability, and passion. When you craft a heart, you’re putting a piece of yourself into your work, making it all the more special.
How to Tie-Dye a Heart: A Master’s Take
Oh, where do I even begin? The process of tie-dyeing a heart is nothing short of a delightful dance of creativity and technique! 😄
Firstly, materials. You know, good quality fabric makes all the difference. I’ve experimented with numerous fabric types over the years, but a nice 100% cotton always does the trick. It absorbs the dye beautifully, giving that rich, vibrant color that tie-dye artists crave.
Now, the dyes. Through the use of this product, I found that procion dyes stand out. They’re just so vivid and long-lasting. Plus, they blend seamlessly, allowing for that organic merging of colors that are essential for a heart pattern.
Speaking of patterns, let’s talk about technique:
- Folding: Accuracy is key! Fold your fabric in half to get a clear center line. This helps in creating a symmetrical heart.
- Drawing: Sketch a half-heart shape on one side, then fold it again to ensure both halves are symmetrical.
- Binding: Rubber bands or strings, they’re both champions in their own right. But after I put it to the test, strings provided that tighter grip, giving clearer and more defined lines.
- Dyeing: Always wet your fabric first! It helps the colors flow and merge, giving that burstiness that we adore. Start with the main color for your heart and then expand outwards with secondary or contrasting colors.
The drying process, oh my, is where magic happens! The anticipation, the wonder – it’s like waiting for a cake to rise in the oven. 🍰
Creating a heart tie-dye shirt is nothing short of a delightful dance of technique and self-expression! Here’s a step-by-step guide on how to make a tie-dye heart based on my experience over the years:
- Choose the fabric wisely. 100% cotton is best for absorbing vibrant dyes. Pre-wash the shirt for the best results.
- Map it out. Fold the shirt in half and use chalk to draw half a heart shape along the fold, then unfold to reveal the full heart.
- Tie it up. Bind the heart shape tightly with rubber bands or string to create dye barriers.
- Prepare the canvas. Soak the shirt in a soda ash solution so the dyes are set properly.
- Time to dye! Apply dye from the heart center outward. Use squeeze bottles to control the dye and mix the dyes in cold water for best blending.
- Let it set. Place the dyed shirt in a plastic bag for 6-8 hours before rinsing to allow the dyes to be fully taken.
- Reveal your art. Rinse with cold water until the water runs clear to reveal the colors.
- Final touches. Wash in mild detergent and admire your one-of-a-kind creation.
A Detailed Look at Heart Tie-Dye Components
Let’s delve deeper into each component involved in tie-dyeing a heart, followed by a comparison table that’ll highlight the differences and benefits of each.
1. Fabric
- Cotton: It’s the most popular choice for tie-dye due to its natural fibers which absorb dye well. Being lightweight, it allows the dye to seep into its fibers, producing vivid colors.
- Polyester: This synthetic fabric doesn’t absorb dye as effectively as cotton. It may result in lighter colors, but it’s durable and retains its shape well.
2. Dyes
- Procion Dyes: Renowned for their brilliance, these reactive dyes bond well with cotton fibers, resulting in long-lasting and vibrant colors.
- All-purpose Dyes: These are suitable for both natural and synthetic fabrics but might fade faster than Procion dyes on cotton.
3. Binding Materials
- Rubber Bands: They’re easy to use and widely available. They provide a decent grip but might not give extremely sharp lines.
- Strings: Strings, when tied tightly, can create very defined resist areas, producing sharp patterns.
| gredient | Option 1 | Option 2 | Benefits |
| Fabric | Cotton | Polyester | gradient |
| Dyes | Procion Dyes | All-purpose Dyes | Cotton: Bright, vivid results: Durable, retains shape |
| Binding Material | Rubber Bands | Strings | Procion: Long-lasting, vibrant-purpose: Versatile but may fade |
Equipment Table for Heart Tie-Dye
| Equipment | Description | Purpose |
| Plain T-shirt | Preferably 100% cotton, white or light-colored, pre-washed | To serve as the canvas for your tie-dye art |
| Procion Dyes | Bright, reactive dyes in colors of your choice | To impart vibrant, long-lasting colors to the fabric |
| Squeeze Bottles | Small bottles with a nozzle tip | For precise application of dye onto the fabric |
| Rubber Bands | or Strings | To bind and create the resist areas on the fabric |
| Plastic Bags | Ziplock or simple plastic grocery bags | To keep the dyed fabric moist during the setting period |
| Plastic Tablecloth | Or garbage bags, to cover workspace | To protect surfaces from dye spills and stains |
| Rubber Gloves | Preferably disposable | To protect hands from dye and prevent staining |
| Water & Sink | Access to running water for rinsing | To rinse out excess dye and wash the final product |
| Soda Ash | Fixative solution | To ensure dye sets properly and remains vibrant |
| Mild Detergent | For washing | To rinse out excess dye after the process |
| Chalk or Washable Marker | Non-permanent | To sketch the heart shape before applying the dye |
| Basins/Buckets | For pre-soaking the fabric in soda ash solution | To prepare the fabric for dyeing |
Remember, while this table provides a comprehensive list, the joy of tie-dye is also about improvisation! You might discover new tools or techniques that work best for you along the way.
How to Tie-Dye a Heart: A Step-by-Step Odyssey
Ah, the journey of tie-dyeing a heart! It’s a whimsical dance of colors and fabrics, and based on my own experience, one of the most satisfying crafts to delve into. Let’s set out on this vibrant adventure together:
Preparation is Key
- Start with a pre-washed, plain cotton T-shirt. This ensures any manufacturer residues are washed off, allowing the dye to penetrate better.
- Protect your workspace with a plastic tablecloth or garbage bag. This venture can get a tad messy!
Sketching the Heart
- Fold your T-shirt in half vertically to find its center.
- Using a chalk or washable marker, gently sketch a half-heart shape on one side. When you unfold the shirt, you should see a complete heart!
Binding the Fabric
- Begin at the top of your heart drawing, pinching the fabric together following the heart shape. Think of it as folding paper when making a paper heart!
- Secure your folds with rubber bands or strings. Tightness is essential! When I tried it out, I found that strings give a more defined boundary, creating that clear heart silhouette.
The Soda Ash Soak
- Mix the soda ash in water according to its package instructions. This step ensures the dye remains vibrant and doesn’t wash out easily.
- Soak your T-shirt in this solution for about 20 minutes, then wring out excess water.
Let’s Get Dye-ing!
- Wear your rubber gloves – unless you fancy rainbow hands for a week!
- Fill the squeeze bottles with your chosen dye colors. Make sure to mix them according to the manufacturer’s recommendations.
- Now, with the burstiness of an artist, apply the dye. Start from the center of the heart with your primary color and work outwards. Don’t forget the back!
The Waiting Game
Place the dyed T-shirt in a plastic bag, letting it sit for at least 6-8 hours, though overnight is best. This patience-testing period allows the dye to be set properly.
Rinse and Reveal!
- With cold water, rinse the T-shirt until the water runs clear. This moment, my friend is pure magic. As the excess dye washes off, your heart design emerges!
- Wash with a mild detergent in warm water.
Admire Your Masterpiece
Dry your T-shirt, and there you have it – a handmade heart tie-dye masterpiece! Whenever I look at mine, it reminds me of the beauty of art and the sheer joy of creation.
Embrace the imperfections and nuances; that’s where the human-like touch shines. Each tie-dye creation tells its own story, and I can’t wait for you to share yours! 🌈❤️🎨
The journey of tie-dyeing a heart reminds us to embrace life’s beautiful imperfections. Each tie-dye tells a story as unique as the human who created it. I hope my guide on how to do a heart tie dye provides inspiration to let your heart shine through your own burst of color and creativity!
FAQ: How to Tie-Dye a Heart
What type of fabric works best for tie-dyeing a heart?
100% cotton is the ideal choice due to its absorbency and ability to showcase vibrant colors. However, you can experiment with other natural fabrics like silk or linen. Synthetic fabrics, such as polyester, may not hold the dye as well.
Can I use regular household dyes or food coloring for tie-dye?
Based on my own experience, while household dyes or food coloring can be used, they might not produce the same vibrant, long-lasting results as dedicated fabric dyes, like Procion dyes.
How can I ensure sharp lines and patterns in my heart design?
It’s all about binding the fabric tightly. When I tried it out, using strings instead of rubber bands provided a tighter grip and resulted in clearer and more defined patterns.
How long should I let the dyed fabric sit before rinsing?
Ideally, you should let it sit for at least 6-8 hours, but leaving it overnight (up to 24 hours) ensures the dye sets into the fabric even more, producing richer colors.
My heart design didn’t come out perfectly symmetrical. Is this normal?
Absolutely! Remember, the beauty of tie-dye is its burstiness and organic nature. Imperfections give your design a unique, human-like touch. Each piece becomes a one-of-a-kind artwork.
How do I wash my tie-dyed T-shirt after the initial rinse?
For the first few washes, wash it separately in cold water with a mild detergent to avoid any color transfer. Over time, as the dye sets further, you can wash it with like-colored clothing.
Is it safe for kids to participate in tie-dyeing?
Yes, with supervision! It’s a fun activity for kids. However, ensure they wear old clothing, use gloves, and work in a well-ventilated area, especially when dealing with dyes and chemicals.

Leave a Comment